Showing posts with label tomatoes. Show all posts

Friday, December 17, 2010

Roma Tomato and Roasted Red Pepper Sandwich


I have been craving a tomato sandwich ever since I saw this post over at Veg Obsession. I try not to make special shopping trips, so the sandwich had to be postponed until today....well worth the wait. I simply toasted two slices of whole wheat bread, and spread both slices with roasted red pepper and shallot dressing, and one slice with vegenaise (optional). For the filling I diced one roma tomato and tossed it with half a clove of chopped garlic, and a pinch of salt. Please don't be fooled by the cell phone picture, this was actually really tasty. I served it along side a wilted spinach salad. I can't wait to try this in the summer, I bet it will be killer with some freshly picked tomatoes and a little basil. I could also see this being really good on ciabatta bread with a little garlic butter spread on there before toasting....mmmmm

Monday, November 1, 2010

Mujadara in a Pita with Spicy Eggplant Sauce


I saw mujadara over at The Vegan Mouse, and my first thought was why have I never made this?? Lentils.......onions....rice??? This is cheap, this is easy, this is flavorful........it will help if you like the flavor of onions, and I really really do. You will find recipes for mujadara all over the web, I chose a simple one that involved only rice, lentils, salt, pepper, cumin, and onions...I added a bay leaf while it all cooked up, but other than that I followed the recipe pretty closely....I wish I could find that recipe now. It is bookmarked on my other computer. I will add it when I get the chance.

Mujadara is very tasty on it's own, but I wanted a little zing to make it into a pita sandwich the next day for lunch. I thinly sliced an eggplant and pan fried it in about 1tbs of oil over medium heat, along with one onion also thinly sliced and 1/2 tsp of salt. I cooked the eggplant for ten minutes, then flipped and cooked for ten more minutes. Then I added a jar of tomato paste mixed with one cup of water (make sure you lower the heat before you add this as it will splatter a good bit). I simmered this covered for about 20 minutes until the eggplant cooked into a mush (mmmmmmm eggplant mush). I removed it from the heat and added about 1/2 cup of heavy whipping cream, more salt, and a generous amount of cayenne. I actually think this sauce would be quite good on it's own as a dip for pita bread, or over rice. I was inspired by a Persian eggplant dish that I have been wanting to make for a while. However I was missing some key ingredients, so this was my compromise. You can use 1/2 cup of coconut milk to replace the heavy whipping cream.

In short this dish will be making the rotation, it is warm and comforting and I imagine it would be quite good in the summer months with some sort of cucumber yogurt sauce. Most of the onions are on the side, which appealed to my daughter, and it's super cheap which appeals to all of us. I heart lentils, how about you?

Tuesday, October 5, 2010

Easy Vegan Spanish Rice


Hello, miss me? I missed you, truly, wholly, and completely. I am feeling...meh....ok, but ok is a marked improvement from miserable so I'll take it. What did I do when I started feeling better you may ask? Clean the bathrooms? Wash the windows? Do the laundry? Of course not! I made muffins, I will post that recipe soon.

For now though, I wanted to share with you a super easy recipe for Spanish rice that is a favorite among the wee members of our household. There is a recipe for Spanish rice that has been passed down through the generations in our family.........and this is not it (sorry Dad). That recipe involves el pato, and I believe lard.....and it has a little kick to it. My daughter doesn't like kicks. So this is what I have been making. To my knowledge a lot of Spanish rice recipes use oil and are vegan, and I've never come across a recipe that is too difficult, so while this could probably also be called "pretty much like every other Spanish rice you have ever had" I thought "Easy Vegan Spanish Rice" had a much nicer ring to it....don't you? You can use brown rice, I have in the past. The cook time will be longer, but it will still be just as tasty. My wonderful husband has been doing more than his share this past week, including the grocery shopping. I used what we had in the cupboard, white rice, cooking times will reflect that.


2 tbs oil
1 diced onion
2 tsp chili powder
1/4 tsp salt
1/4 tsp dried oregano
1 cup uncooked rice
5 cloves garlic that have been peeled and finely chopped
1 14.5oz can of petite diced tomatoes
1 can worth of veg stock, or corn stock*
garlic salt and salt to taste

Heat the oil in a medium sized pot over medium heat.

Add the onion, chili powder, oregano, salt, and cook for about two minutes.

Add the rice and chopped garlic and cook for about 5 minutes. The Onion should be tender and the rice should start to become a golden color. Stir to keep the garlic from burning.

Lower the heat to medium low and stir in the tomatoes and stock. Stir to prevent tomatoes from burning.

Bring to a light simmer and cover. Cook for about 30 minutes, or until all of the liquid is gone.

Remove from heat and add salt and garlic salt to taste.

I've also been known to add bell pepper, corn, cayenne for heat, spinach and jalapeno. This is quite lovely when served with refried beans and grilled veggies (bell peppers, onion, mushroom etc). Pile it all into a tortilla for a fantastic burrito that is full of flavor and dairy free.


*When I buy stock I like to buy it in boxes. You'll not find (to my knowledge) corn stock in the stores, but I keep some in my freezer. Simply pour stock into the empty tomato tin and voila one can worth of veg stock. :)

Friday, September 17, 2010

Lentils In a Creamy Spicy Tomato Sauce


I am a lean (kind of) mean (not on purpose of course) meal freezing machine!


Little man had a stomach bug that totally caught me off guard. All he wanted was to be held and cuddled 24-7, and while I in no way mind doing so it made me aware of the fact that we are getting low on freezer meals. Anyhoo, you may see a little less of me in the next few weeks as I build up my reserves. In the mean time, we are also still working on squirrelling away money to put into savings. And what is cheaper than lentils?? Right? Well I served this dish over rice, and you could use any type of beans you like in place of lentils.

This meal is the perfect example of why I like to have lots of spices on hand. This is really a quite ordinary dish...garlic, tomato sauce, beans, not very exciting at all. By using some spices that I always have readily available, garam masala, cumin, paprika, it turns into a scrumptious dish that the whole family enjoys.

What you need:

2 tbs butter (or olive oil)
3 tsp garam masala
1 tsp paprika
2 tsp cumin
1/4 tsp dried ginger
1 tsp chili powder
dash or two of cayenne
5 cloves of pressed garlic
1 can tomato paste
1 can tomato sauce
1 can coconut milk
Salt to taste
2-4 cups of cooked beans (I used lentils, kidney beans might work well in this too)
If you want to go with canned beans, be sure to drain and rinse them well.I used a lot of beans, I was going for a high protein high fiber meal. Add the beans to your liking and tastes.


Melt the butter (or heat the oil) over medium heat and add the spices (garam masala, paprika, cumin, ginger, chili powder, and cayenne). Cook about a minute and a half until fragrant.

Add the garlic and cook one minute more.

Add the tomato paste and stir. Lower the heat if necessary, tomato products are quick to burn (if memory serves me this is because of their high sugar content, anyone know for sure?)

Slowly stir in the tomato sauce and the coconut milk.

Add salt to taste and heat through.

Add the beans and cook until heated through once more.

Adjust to suit tastes (more cayenne, salt etc) and serve over rice. Garnish with cilantro.

Although this lovely dish looks kind of like dog food it was quite tasty, and we all enjoyed it very much. I hope you do as well.

Monday, September 6, 2010

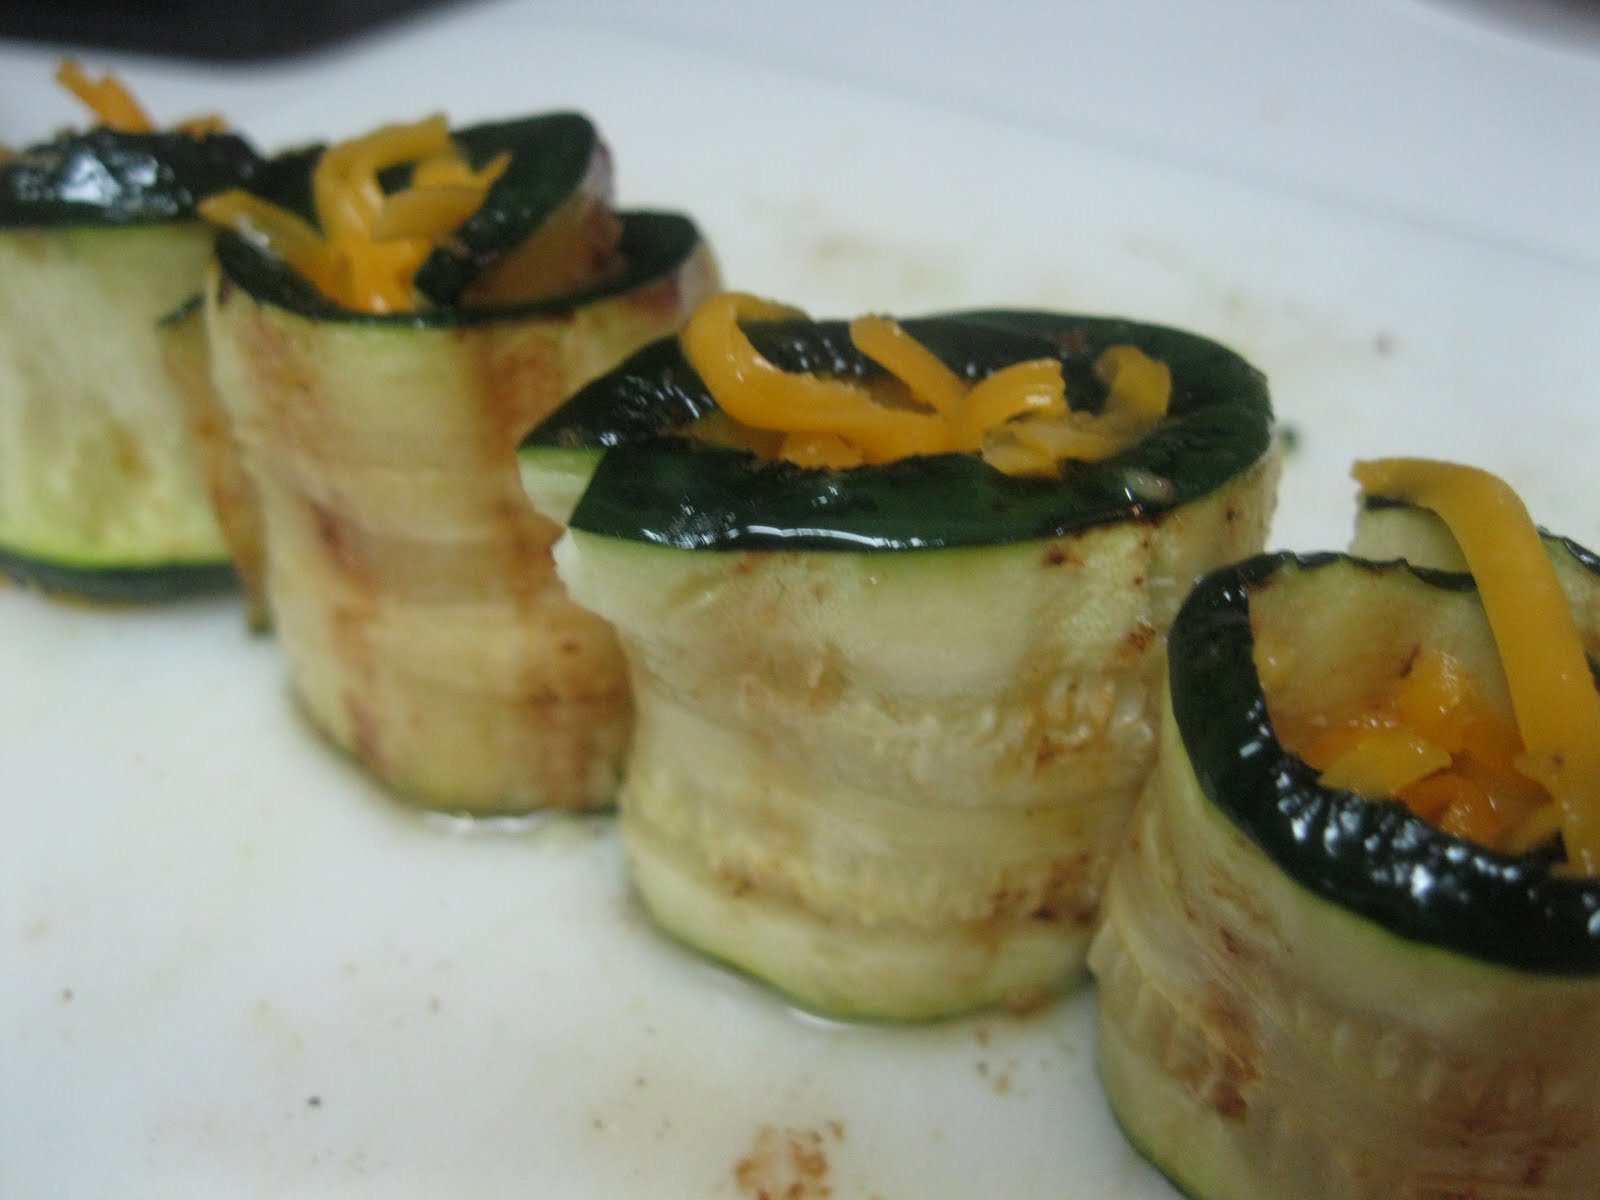
Garlic Ginger Grilled Zucchini Roll-ups


I would recommend this to a zucchini hater. I myself used to be a zucchini hater, but this recipe helped me change my mind. What I hated was the taste of raw zucchini, something about it totally grossed me out as a kid. Now that I have learned how zucchini caramelizes on the grill, and how well it works in veggie pancakes, I've been won over. If you are super zucchiniaphobic, you might want to start out by trying them in veggie pancakes and working your way up to these.

I made two types, one with feta for us adults, and one with cheddar for the kids. I'm not going to recommend the cheddar ones, the kids were ok with them.....but they don't know how wonderful feta is. However, because I didn't think to take pictures of the process until I had already rolled all of the feta ones, you will get pictures of the less tasty cheddar version. You can also add diced roma tomatoes, and chopped fresh herbs to the filling with very tasty results.

You will need one recipe garlic ginger butter , zucchini, and feta cheese. It's that simple!

Melt the garlic ginger butter.

Wash off the zucchini and chop off both ends. Slice it thinly lengthwise and brush it with the garlic ginger butter. Throw it on the grill until it has these little liney thingies, and is pliable...see picture below....
Line those babies up and sprinkle feta, diced tomatoes and whatnot over the top half of the zucchini.
Roll them up and serve immediately! Here's what the kids version looked like....
I served these along side manicotti. I found 1/2 of a box of manicotti noodles in my cupboard, and though I didn't have all the ingredients I normally use I improvised.....and it was a hit. My daughter raved that she loved "circle shaped spaghetti".....do you want to know what I did? I replaced the mozzarella with cheddar...not a huge leap, and I replaced the ricotta with.....beans....white beans.....and it was delicious. My husband said he liked it better than regular manicotti. All you do is drain and rinse one can of white beans, and throw it in the food processor. I added one clove of pressed garlic and seasoned it as I would ricotta (salt, pepper, oregano, and a dash of nutmeg). It was a little thinner than normal manicotti filling, but it was pretty tasty. I didn't get any good pictures (again I wasn't thinking) but I got a picture...which is about all you really expect from me by now isn't it? That's the game, set the bar low.;)

I made this dish out of mostly pantry and staples so I'm labeling it a pantry meal......because I can, because it's my blog. :)

Wednesday, August 25, 2010

Taco Tuesday (I know it's Wednesday...shhhh)


Question:
When is an appetizer an entree?


A.) When I say it is, because I'm the mom.
B.) When you serve it in a 9x13 casserole dish
C.) When I say it is, because this is my blog.

Answer:
All of the above.

This dish can be eaten as is, or in taco shells (as we prefer it). You can mix it up quite a bit, spinach in place of the lettuce, add jalapenos, bell peppers, or whatever else strikes your fancy. It's basically seven layer bean dip, but I put it in a really big casserole dish and call it dinner.

I make my own refried black beans, so the measurement of three cups might not exactly equal a full two cans of the canned stuff....but this is bean dip...for dinner...I don't think you have to follow the recipe too closely. Omit what you like, keep what you like, serve stuff on the side that causes your children to vomit on you.....which reminds me of a story.......

A story that should probably wait for my picky eaters post.....
I should probably just get to that recipe.


3 cups of refried beans
1/2 cup salsa
1 cup shredded cheese
1 can of sliced olives that have been drained
1 bag shredded lettuce (or baby spinach)
1 chopped roma (or other) tomato
1 diced avocado
1/2 cup cilantro (washed well, with the majority of the stems removed)
1 diced onion if desired

Corn tortillas


Preheat the oven to 350 degrees.

Spread the refried beans into a 9x13 baking dish.

Spread salsa on top of beans.

Sprinkle cheese and olives on top.

Bake for about 20 minutes, or until it's hot and bubbly.

I used the time to prep my toppings....
Also, if you are using corn tortillas you will want to take this time to heat them according to the directions on the package.


Once the beans are done you have a "blank" canvas of sorts......the best kind of blank canvas, one that's made of cheese!


Layer your lettuce, avocado, onion, tomato, and cilantro over the top. Add whatever else you want. Add heaping scoops of this cheesy goodness into your corn tortillas and eat!
Wednesday, August 18, 2010

Fillo cups two ways (sweet and savory)

Remember these beans? Remember when I said they would be back. Well here they are on whole wheat tomato and feta sourdough bread. This was not what I had in mind, it was just a happy accident that I needed to use my starter, and I happened to have these beans. So good! I had to take a picture and share, these beans are quite versatile.

Back to the filo cups though. I thought it would be fun on a hot day such as today to feast on cold appetizers and have a game night. We ate these garlic bean filled fillo cups as well as the "yummy pink cups" as my daughter dubbed them, along side some homemade salsa and chips. Everything went over really well. Both children were hesitant to eat the cups at first, because I've told them that cups aren't for eating.

I am marking these as make ahead, even though in the strictest sense they are not. You can make the filling ahead of time, but I would recommend filling them right before eating as they might get soggy otherwise.

The "pink yummy cups" are really an adaptation of learning to live egg free. I used to fill fillo cups with a combination of lemon curd and yogurt, and top them with fresh raspberries (YUM!). No longer an option in our household. This new recipe was not only a hit, but a suitable substitute. If I ever figure out how to make an egg free, soy free, lemon curd I'll post it on here.


Garlic Basil Bean and Roma Tomato Fillo Cups

1 recipe garlic basil beans
2 diced roma tomatoes
1 tsp vinegar (balsamic or otherwise, I used raspberry basil vinegar)
30 mini fillo shells (2 boxes)
shredded cheese (optional)

Thaw filo cups according to directions on box. Mix together the garlic basil beans, roma tomatoes and vinegar. Distribute evenly into the filo cups. Sprinkle cheese on top if desired. You could heat these if you like the bubbly cheese element. They were very tasty cold though, especially on a hot day.


Pink Yummy Cups

1 oz cream cheese
1/4 cup organic vanilla yogurt
2 tbs fruit preserves (I used this)
15 mini fillo shells

Thaw mini fillo cups according to directions. Soften the cream cheese in a bowl. Stir in yogurt and preserves. Distribute evenly (about a tsp to each) into fillo cups. Chill and serve.


Sunday, August 15, 2010

Organic Tomato Bisque with Garlic Basil Beans and Croutons


Whew...that was a long title. And guess what, I spelled "bisque" right on the first try. Go me! Really it's everything in the title....plus a variation on the soup. The tomato bisque is canned...shhhh don't tell.

The hubster and I eat it straight out of the can (pictured), but I kick it up a notch (calorie wise) for the kids. So I'm including the recipe for the garlic basil beans, and also the recipe for the creamy version of the soup that I make for the kids. The creamy version is actually really, really, really, really, good....but I don't need all of those calories, because I'm not growing (on purpose that is). The croutons are simply whole wheat rosemary bread that I cubed and toasted in the toaster oven.


Garlic Basil Beans

1 can of white beans
1-2 cloves of garlic, pressed
2 tbs chopped basil leaves
1 tsp olive oil

Drain and rinse the beans really well.

Combine the beans, oil, pressed garlic, basil and beans in a bowl.

Add salt if desired. I felt like it wasn't needed because I used canned beans, but that was my preference.

Refrigerate until ready to use.

This will be making a comeback again later this week...keep an eye out for it. :)


Creamy Style Organic Tomato Bisque

1 package cream cheese
1 can of organic tomato bisque
2 tbs butter
1 clove of garlic, pressed

Combine the cream cheese and soup in your food processor and process until smooth.

Meanwhile in a pot melt the butter over medium heat. Add the garlic and cook one minute.

Slowly add the soup to the pot, stirring and lowering heat as necessary to avoid burning.

Heat through.

Enjoy!

Little man ate two bowls of this, and little girl (who didn't nap) insisted she didn't like soup.....because it was too soupy....even though soup is her favorite dish...go figure. After being persuaded to try a bite, she finally confessed it was indeed good and ate the whole bowl. There was much rejoicing and merriment in all the land....err...at least our house.

Tuesday, July 27, 2010

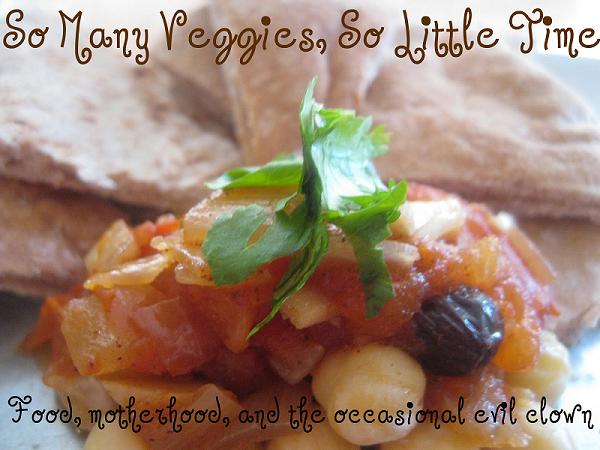
Slow Cooker Tomato Chutney

Every summer amidst the abundance of fresh ripe tomatoes I dream big dreams. I always want to make new and exciting dishes.....and I always* end up with bruschetta. Why? Because bruschetta with roma tomatoes and basil from your garden is the bomb diggity. Plus it is quick to make and I usually can't stand the temptation of sweet, juicy, tangy, mouth watering tomatoes on the counter long enough to do anything else with them. So this recipe was a success on several levels. I broke my bruschetta habit (go me). It was fantastically tasty. And I now know that I can make chutney in a crock pot!

Mine was a little more watery than the jarred stuff, but I've changed the recipe to adjust for that. Depending on how juicy your tomatoes are you may have the same problem, if it bothers you the chutney can always be thickened in a pan on the stove top. This works great as an appetizer with toasted pita chips, over rice, as a pizza sauce, or on grilled cheese. Pictured served over chickpeas, with pita wedges, and cilantro for garnish.

Ingredients

1 1/2 pounds of tomatoes (I used six)
Oil to coat pan
2 small onions
2 cloves of garlic chopped
1 tbs minced ginger
1/2 tsp salt
1/4 tsp ground ginger
1/2 tsp cinnamon
1 tsp chili powder
1 tsp garam masala
1/2 tsp cumin
cayenne to taste
1/3 cup raisins
1/3 cup vinegar
2 tbs if sugar (more to taste depending on the sweetness of your tomatoes)

Chop off the end bits (or stems, whatever) of your tomatoes and place them cut side down in the crock pot.

Heat the oil in a pan over medium heat. Wash peel and dice the onions and throw them in the pan. Cook for about three minutes.

Add the garlic, ginger, and salt. Cook for two minutes more taking care not to burn the garlic.

Add the rest of the spices and cook two minutes more.

Take the pan off of the heat and stir in the vinegar, sugar, and raisins.

Dump the whole mess into your crock pot over the tomatoes.


Cook on low until the tomatoes start to cook down. They will kind of crack, and wrinkle.
Like this. Beautiful eh? Turn off your crock pot now.

The next step is a matter of taste....or texture rather.

Pull the tomatoes out and let them cool. At this point you can either puree these bad boys, mash them, or some combination of the two. I did half and half.

Add the mutilated tomatoes back to the pot and stir them in.

Enjoy!

*Ok.....I'm lying, not always. But darn near every time.


Update: Taking the lid off for the last hour of cooking will reduce the watery issue! Remember though, if you use a less juicy variety of tomato (roma etc) you may not have to.

Thursday, April 15, 2010

More Chapati Pizza


This chapati was topped with an Indian inspired sauce, cheddar cheese, and sprinkled with chili powder. Grilled, or pan seared tofu would make an excellent topping in place of the cheese for a dairy free (vegan) version of this dish or even in addition to the cheese for an extra bit of protein.

I used the recipe I always use for chapati but found that I needed much more olive oil than last time.....perhaps because I had to keep interrupting my kneading to wipe, hold, or feed a child. The sauce came together quite well, despite the fact that I needed to improvise a bit with my ingredients and their amounts.

The sauce

5 cloves crushed garlic
1 tsp garam masala
1/2 tsp ground cumin
1/4 tsp ground ginger
dash or two of cayenne (if you like spice)
1 can of tomato sauce 15oz
olive oil to coat the pan

Heat the olive oil over medium heat. Add the garlic, and spices, stirring to keep the garlic from browning. Cook for two minutes, until the spices become fragrant, stirring as needed. Add the tomato sauce and stir. Cook for five minutes more, stirring occasionally. At this point the sauce should be bubbly, and the spices should have had a chance to work their way around the sauce. Taste and add salt as desired.

Top the chapati with a few spoonfuls of sauce, some cheese (or tofu) and a generous sprinkling of chili powder. Heat in the toaster oven until cheese bubbles, or you just can't wait any longer. :)

Monday, February 22, 2010

A Celebratory Pantry Meal


We got our tax rebate today, and despite the fact that about 80% of our money is going to road trip 2010, I felt it was important to celebrate. If nothing else to be thankful that we have the money to drive 60 hours across the country stopping only to rest for a few hours in budget hotels, all so we can spend a few days in various places around the west coast.....wait....why are we doing this again?...I must really love my friends and family*. I however didn't feel like spending any of the money not already allocated to the trip on groceries, so I whipped up an Indian spiced dish that is one of the hubsters favorites and only requires things we normally have on hand.
As far as the picture goes....well...whenever I try to photograph Indian food it always comes out looking like dog food...sigh. So even though this isn't the prettiest of dishes, I used all of my limited photographic skillz** to make it look like....well...dog food.

Indian Spiced Black Beans in a Creamy Tomato Sauce

What you will need

Olive oil to coat the pan
6 cloves of minced garlic
1tbs minced ginger
3tsp garam masala
3tsp ground cumin
1tsp chili powder
1 or 2 dashes of cayenne
1/4 tsp salt (more to taste)
3 cups black beans
2 cans tomato sauce
1/4 cup heavy whipping cream (omit for vegan option)
1/2 cup chopped cilantro

Heat the olive oil in a large pot over medium heat, add the ginger and garlic. Stir and heat for one minute. Add the spices and heat for one more minute or until fragrant, stirring frequently. Add the black beans and stir to coat with spices. Add the tomato sauce and heat thoroughly. Take off of heat and add the heavy whipping cream and the cilantro. Serve over brown rice.


*I really really do love my friends and family, I hope you know that. I also love sourdough....which may have had some impact on my decision.

** I made it small and used an odd angle to distract you from how bad the food looks.

Saturday, January 30, 2010

Quick Chickpea and Potato Curry


I recently bought some Masala simmering sauce from Trader Joe's. I wanted to be blown away and I was not. Super sad face goes here--->, because I love TJ's and wanted a super quick curry for lunches.
Well with a wee bit of adjustment, adding things like fresh garlic and ginger I was able to give it a more homemade taste.

What you need
1 tbs olive oil
5 cloves garlic smashed and minced
1 onion diced
1/4 tsp salt
1/2 tsp garam masala
1/2 tsp ground cumin
1 dash cayenne (or more to taste)
1 can diced tomatoes
1 Jar of masala simmer sauce
1 can chickpeas drained and rinsed
1 potato diced
2-3 handfuls of spinach (optional)
yogurt and chopped cilantro for garnish

In a large pot heat the oil. Add the onions, garlic, ginger, potatoes, and salt, cook for two minutes. Add the spices and cook for one more minute. Add the diced tomatoes, simmer sauce and chickpeas. Simmer covered until potatoes are cooked. Add the spinach and cook for a few more minutes. Serve topped with yogurt and cilantro....or not. This is also yummy on top of rice, but then it really isn't a one pot dish.
Related Posts Plugin for WordPress, Blogger...